
- 10日4月2023年
Smalland | Build a moving house | Build a base using Great Trees
SmallandSmalland |How to b……

Cyberpunk 2077
This article is for those who have played Cyberpunk 2077 on PC or are considering playing it. “It’s quick, but aren’t you worried about allocating ability points for character development?”
This is because once you assign ability points in this work, you cannot redo them. “There is a mod that completely ignores this specification and allows you to reallocate your ability points freely.”

No more worrying about ability points!
【目次】
Here, for those who have just started playing Cyberpunk 2077, I would like to touch a little on the mechanism of character development.
As of version 1.61, there is no change in the character level being Lv50 and being a complete strike. With the new expansion content scheduled for 2023, it would be nice if there was an update to the upper limit of the level. Because “points” and “park points” are a headache problem.
| Point type | Acquisition method | Reroll |
| ability points | Acquired when character level up | Impossible |
| park point | Acquired by performing a certain amount of specific actions (frequency of use of each weapon type, actions that consume stamina, stealth, hacking, etc.) | Possible |
The above is a fairly simplified description of each point earning method. As you can guess from looking at this, the fact that there is an upper limit for character level means that there is also an upper limit for ability points. And as for character development, various abilities will be added by raising the body, reaction, technique, will, and intelligence, as shown in the image below. The maximum ability value for each character is 20, and the total ability value that can be obtained by completing the character level is 71.
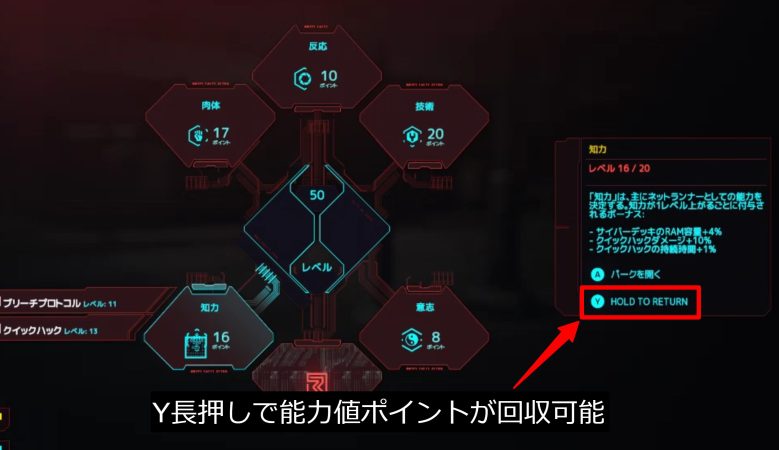
In other words, an almighty character that maximizes all ability values cannot be trained.
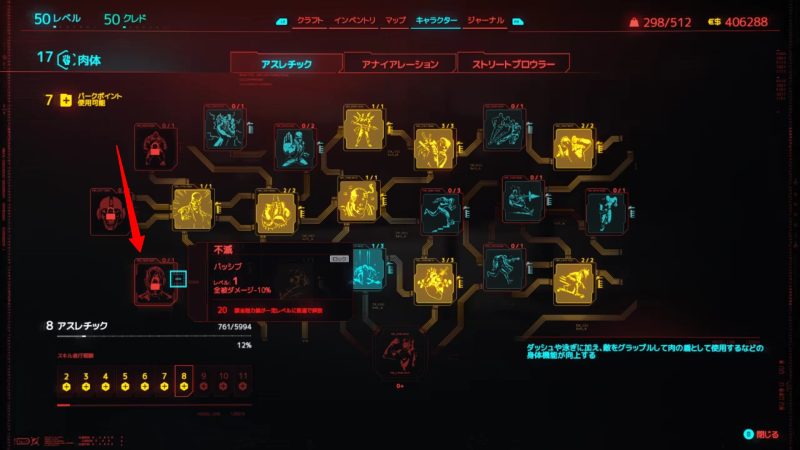
In addition, each ability has a perk skill, and in order to acquire it like the image below, not only perk points are consumed but also the required ability value level is set. Including these, it is necessary to decide to some extent what kind of character you want to raise and raise it.
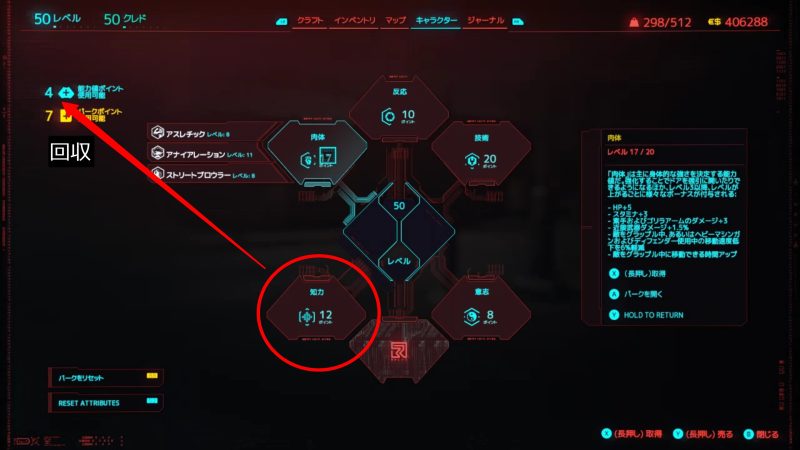
Due to the specifications of the game, it is possible to reassign perk points, but once ability points are consumed, they cannot be redone. Even if you find a perk skill that you want to use after completing the character level, you may not have enough ability points to acquire it, and you may have to go through the second round to use it.
This mod will solve this problem. As you can see in the image below, it is possible to collect the ability points that have been invested once and use them for other abilities. “I think it’s very convenient, and I don’t think it’s a cheat at this level.”
I will touch on mods from here, but I need to say something a little risky for those who are new to the introduction. Mod is something that gives you things you can’t experience in the original game, but you need to take full responsibility for the introduction.
In the first place, MOD is a fragmentary data or program that enables the following things.
In other words, it introduces other data and programs into the standard game program files. “In the worst case, even if the game stops working due to this act, no one will take any responsibility or liability.” In order to install mods, it is necessary to have enough knowledge to back up game files and delete them if the mod itself does not work properly.
I used a slightly threatening expression, but as long as I have a backup, if something goes wrong, I can do something about it. “Let’s google the knowledge to the extent that backup and restoration are possible!”
The mods introduced here are available from the website Nexus Mods. As shown in the image below, if you search for “Nexus Mod” in Google search, it will usually appear at the top.
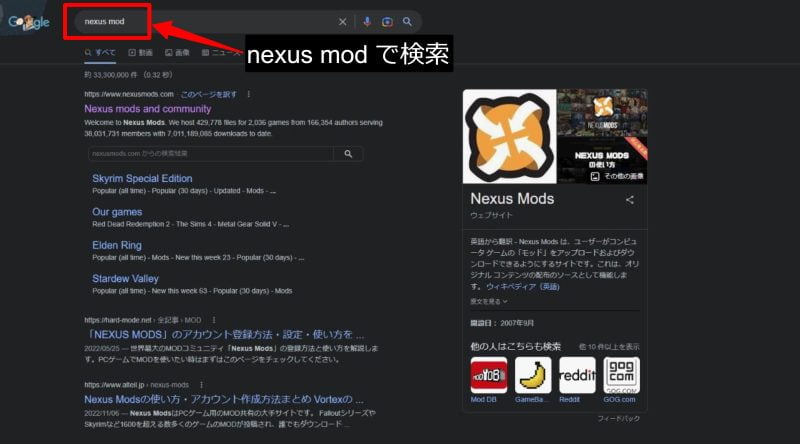
Just in case, I leave it here so that you can access it.
[blogcard url=”https://www.nexusmods.com/″]
Free account registration is required to use Nexus Mods. When you access the site, the screen below will be displayed. If you use the translation function, the display will overlap and it will be difficult to use, so it is recommended to use it in English. “It’s a good idea to use the translation function only when you actually want to know the meaning of the text when you’re used to it.”
First, click the orange tag on the top right of the screen.
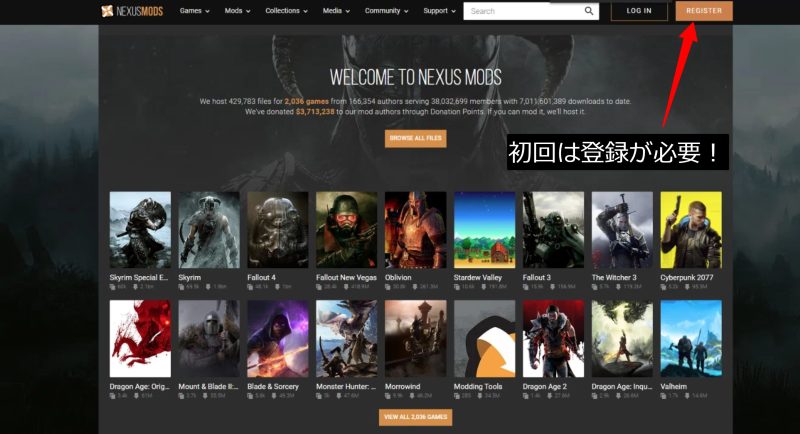
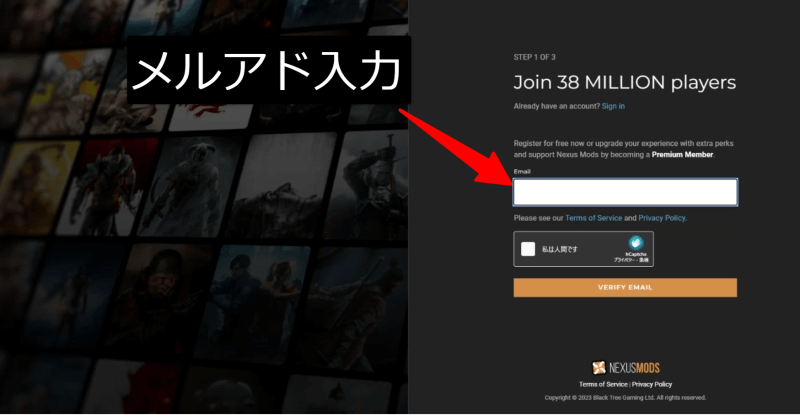
Click the orange tag to switch to the email address input screen. After certifying that you are a human and clicking the orange bar, you will receive an email, so please access the registration screen from the email you receive and enter the necessary information.
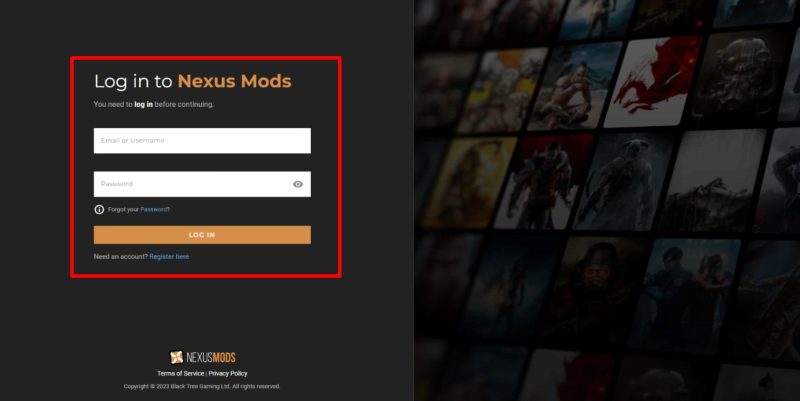
Once the registration process is completed, the work begins.
If you let Windows remember your login information, you will be logged in automatically.
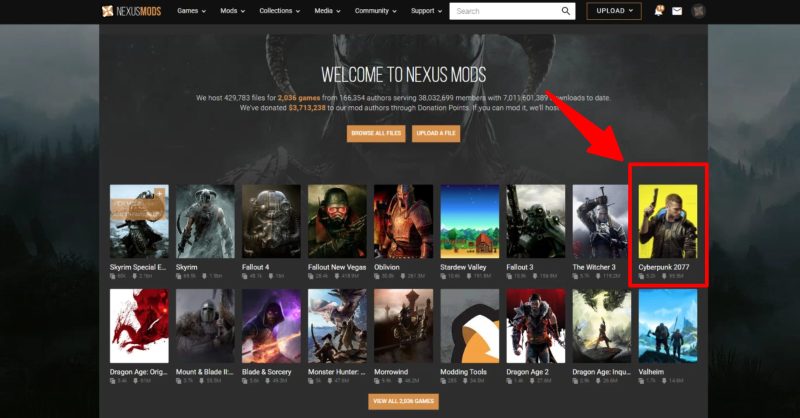
After logging into Nexus Mods, you will see a game list screen like the image below. This time, we will be downloading the “Cyberpunk 2077” MOD, so click on the familiar image to select it.
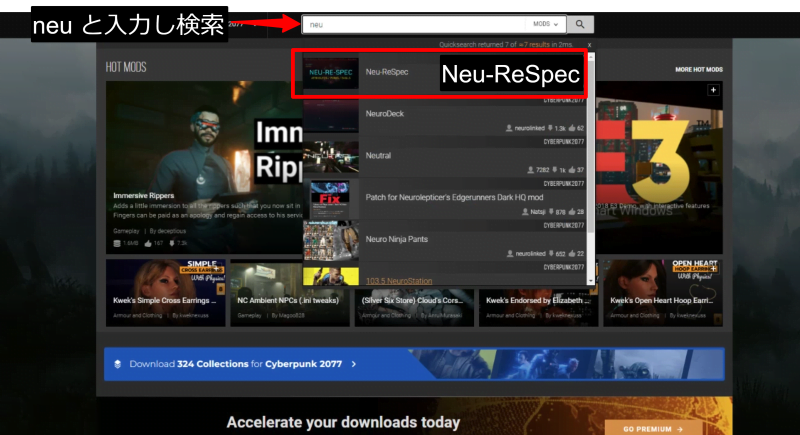
Next, enter neu in the search field at the top of the screen and search for it, and you will see some ugly mods. Select “Neu-ReSpec” from among these.
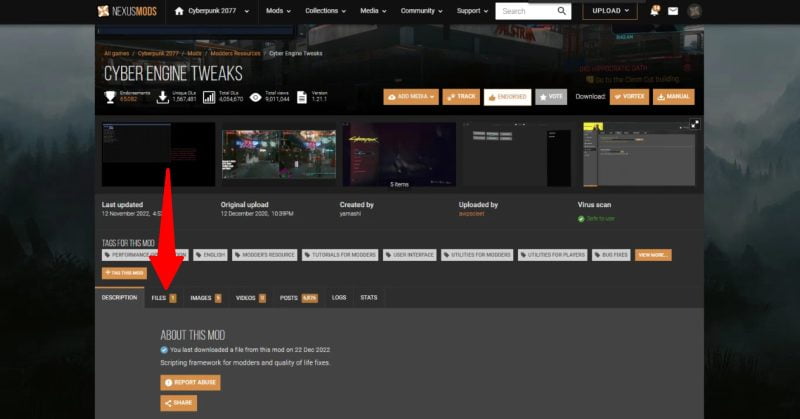
Now it’s time to download the mod file you’re looking for. “What I want to introduce this time is a MOD called “Neu-ReSpec”.” If you look at the image below, there is a tag called FILES. “Most mods can be obtained from the page that appears when you click here.”
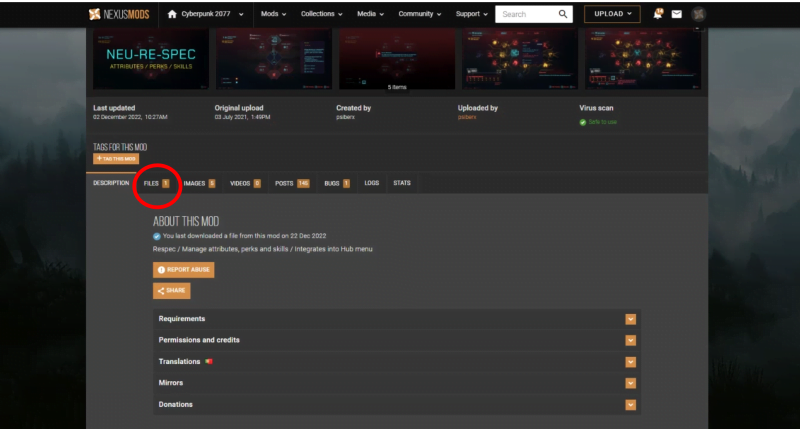
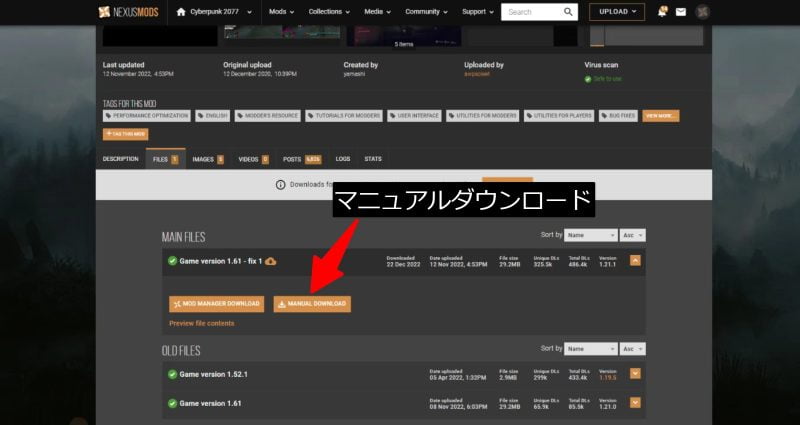
Clicking on the FILES tag will bring up a screen like the one below.
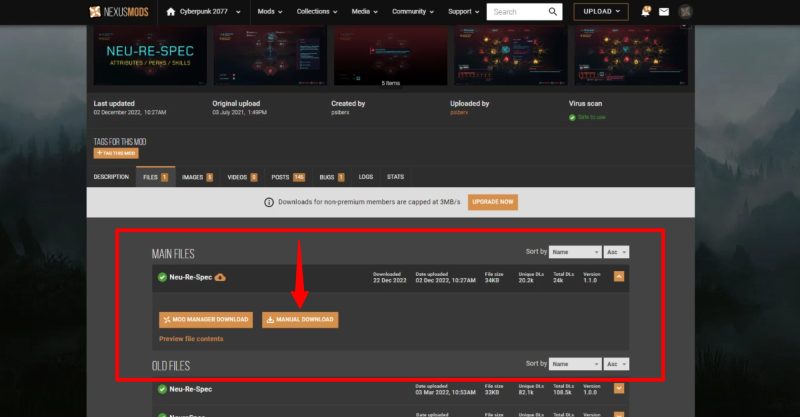
You should see the mod manager download and manual download in the orange bar. “There are differences in the download destinations, as shown below.”
| MOD MANAGER DOWNLOAD | Vortex Mod Managerに直接ダウンロード |
| MANUAL DOWNLOAD | Download to a location of your choice, such as your desktop |
Here, select “MANUAL DOWNLOAD”. Then the following display will appear, announcing that the Cyber Engine Tweaks file is required. “Let’s download Cyber Engine Tweaks first.”
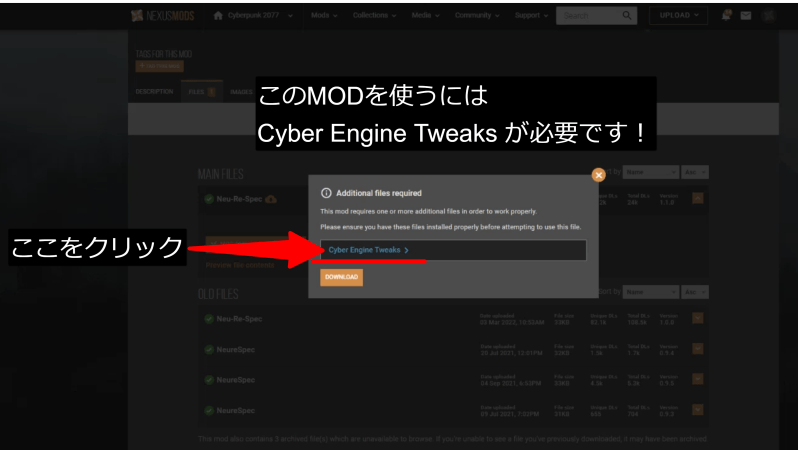
Many mods require basefile mods in order to function. This Cyber Engine Tweaks is required by many mods, so let’s get it and introduce it to the game file.
Manual download from FILES tag.
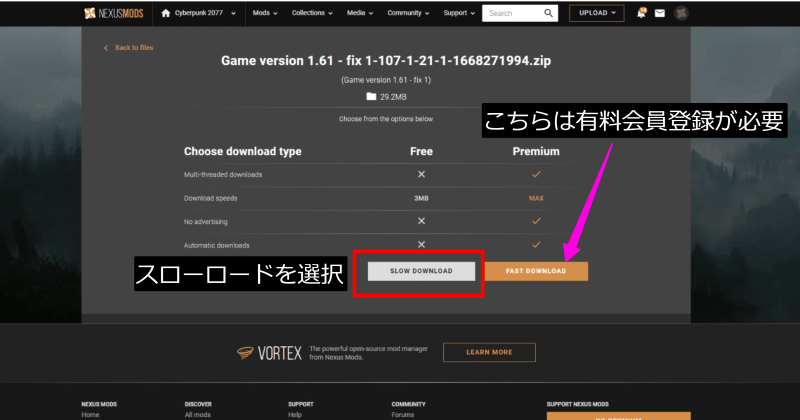
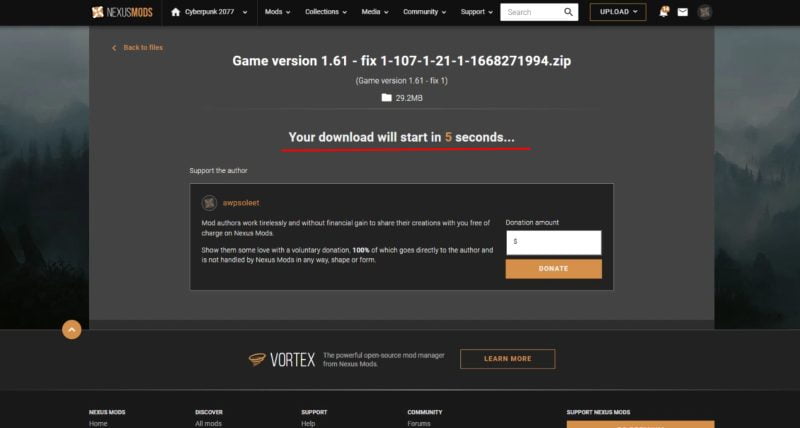
Download methods include SLOW DOWNLOAD and FAST DOWNLOAD. Free members will have a SLOW DOWNLOAD, but if you wait about 5 seconds the download will start, so there shouldn’t be any problems. Rather than that, let’s be conscious of making the download destination an easy-to-find place such as the desktop.
After downloading Cyber Engine Tweaks, I quickly downloaded Neu-ReSpec to the same location and was ready for the first stage.
From here, it will be work in the gaming PC. “First, expand the downloaded MOD.” The MOD is downloaded in ZIP file format, so you will need to expand (decompress) it. Even if you say “expand,” the ZIP file is a format that Windows supports as standard, so you can just double-click it.
A ZIP file is a collection of multiple files, also known as a compressed file.
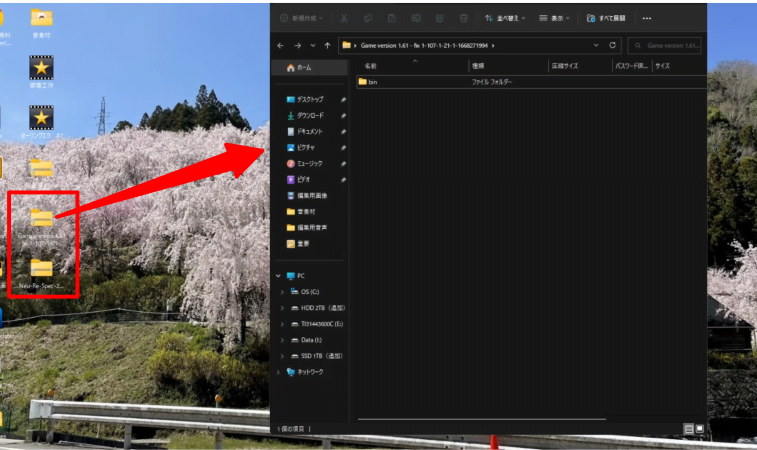
Let’s display the MOD file and the game file side by side to make the installation work easier. This time, the MOD file is on the left and the game file is on the right.
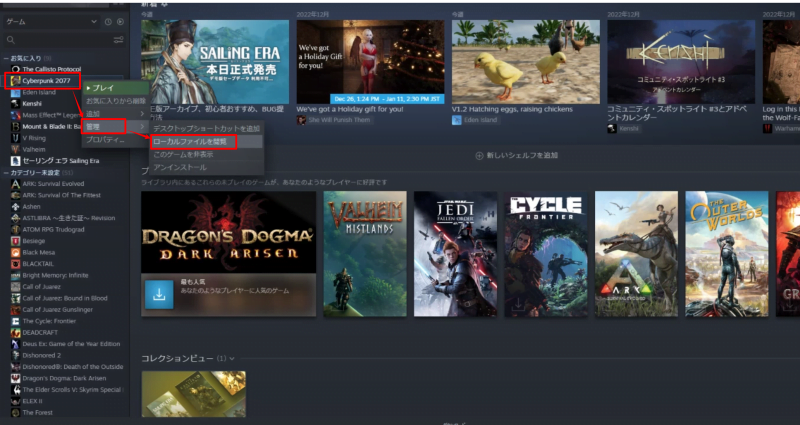
Launch Steam and right-click Cyberpunk 2077 from the games list on the left. Then, the items will open hierarchically as shown in the image below, so left-click on Manage → Browse local files. “It’s OK to close Steam now.”
Some of you reading this article may be trying to install mods for the first time. Since this is important, I would like to touch a little on the structure of the file and the order in which mods are installed.
[About file structure]
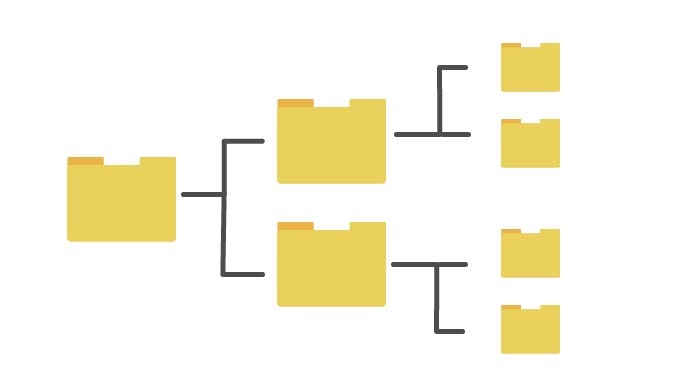
Both MOD files and game files have a hierarchical structure like this simple diagram. This is surprisingly important, and if you know it, you will be able to determine which parts are necessary for the introduction.
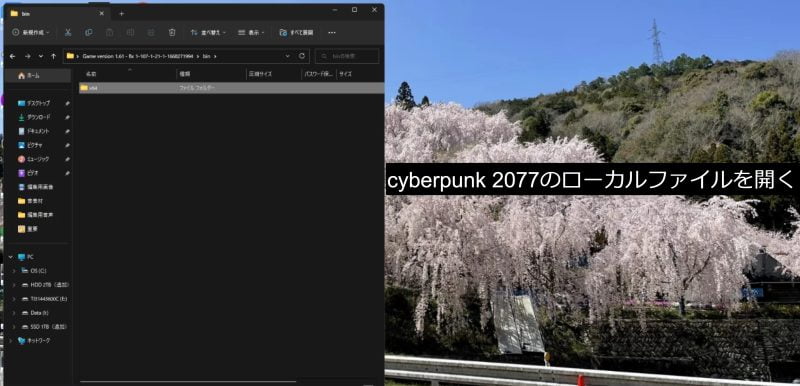
Double-click to move down one level, and to return to the upper level, click the up arrow circled in red as shown in the image below. “Some people may find it a little difficult, but the points to look at when introducing mods are very simple.”
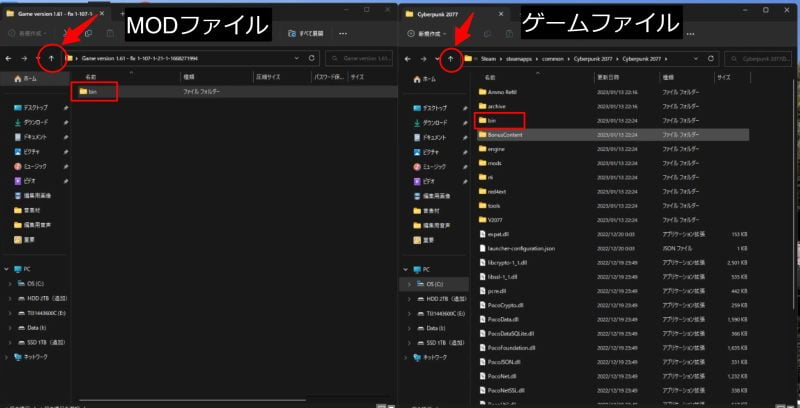
Now let’s see for ourselves. First, place the MOD file on the left and the game file on the right like the image above. If you execute the following three items, you should be able to arrange them like the image above.
1,Double-click the ZIP file and move it to the left
2,For game files, browse local files from Steam and move to the right
3,Double-click once on the “Cyberpunk2077” file folder in the right file
If you look left and right here, you should notice that the same file folder called [bin] exists. From here, double-click to follow the file folders with the same name on the left and right to proceed down the hierarchy.
You should end up with a file folder that exists on the left but not on the right. At this time, it is important that the left and right file holders have the same name and stay in the same hierarchy.
This file folder that exists only on the left side should be introduced on the right side.
| Hierarchical points Whether or not there is a file folder with the same name on the left and right when the file folder with the same name is opened. If yes = double click to proceed If not = MOD file should be installed |
[Mod introduction order]
MODs have an order of installation, and basically it is recommended to install the MOD files necessary for the desired MOD to function. In this case, ①Cyber Engine Tweaks ②Neu-ReSpec will be introduced in that order.
Let’s install from Cyber Engine Tweaks according to the procedure. Place the bin file folder that appears after extracting the Cyber Engine Tweaks ZIP file on the left, and place the Cyberpunk2077 local file called from Steam by double-clicking it once on the right, just like the image below. .
It is OK to drag and drop the bin file holder on the MOD side as it is and move it to the empty space on the right side.
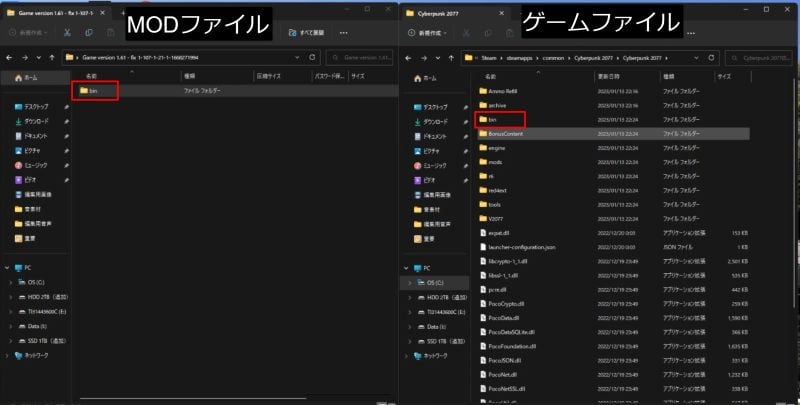
As shown in the image below, you can follow the left and right file folders with the same name as described in the previous section, and drag and drop to the right in the hierarchy where Cyber Engine Tweaks appears on the MOD side.
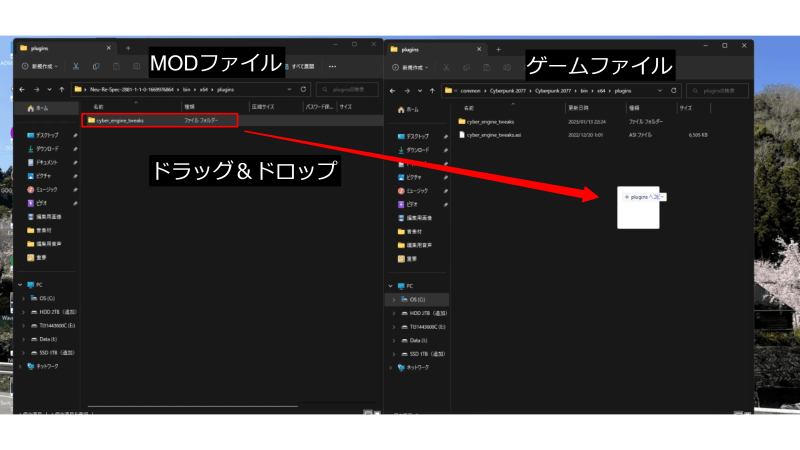
After installing Cyber Engine Tweaks, it’s time to install Neu-ReSpec. “It’s fine if you drag and drop here in the same way.” However, if you drag and drop the bin file holder, all the layers below bin will be introduced, so if there are duplicate files, you may be asked for “overwrite permission”. “This is OK to allow overwriting.”
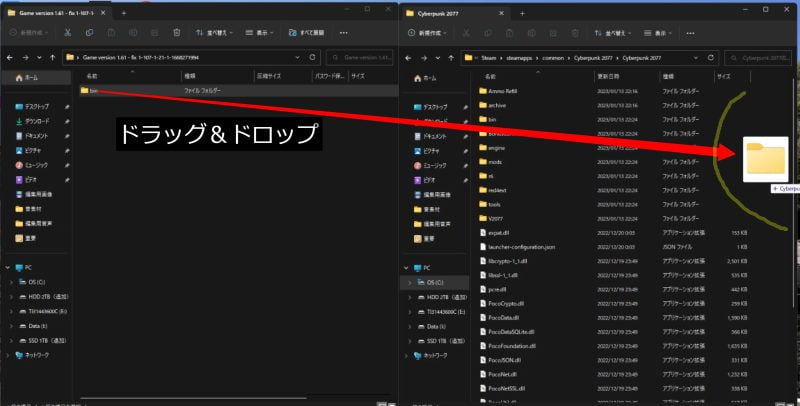
It is recommended to check the introduction at the end so that you can get used to the series of tasks. If the file holders with the same name exist on the left and right until the end, it is proof that the installation was successful.
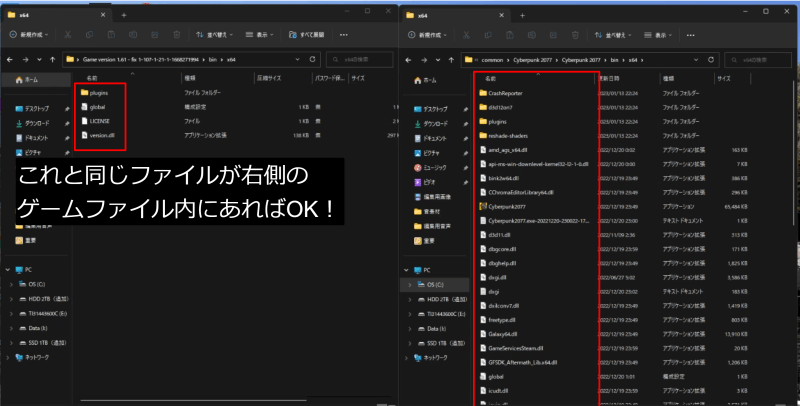
It is not uncommon for mods that exist in a huge amount to not function even though they have been successfully installed. “After investigating, it seems that there are various possible causes for this.”
Possible causes
There seems to be no end if you think about it. Taking this opportunity, if you introduce some mods in the future, you may encounter various problems. “In such a case, it may be necessary to delete the installed MOD file.” When installing, always consider failures and start with thorough preparations such as preliminary investigations and backups.
The introduction of MOD is self-responsibility! Don’t forget to be
Finally, I would like to introduce the Vortex Mod Manager, which I touched on briefly in the article. If you download this to your gaming computer, it will launch in the same way as launching Steam. The image below is Vortex, but at first glance it looks like a platform.
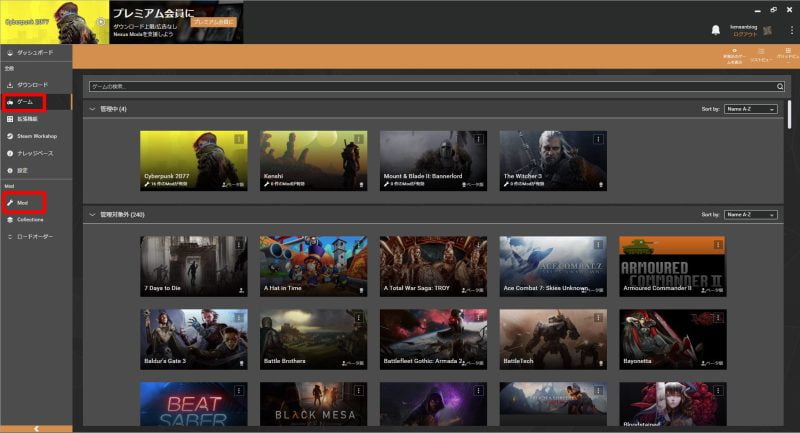
Vortex is an application (software?) that can centrally manage games and mods, and the mods introduced in this can be enabled or disabled with a single button. “It’s very useful, but some mods don’t work.” If it doesn’t work, it may work if you manually download it and introduce it directly into the game file.
It’s not perfect, but it can be used in conjunction with manual download. “In that case, the game will be launched from Vortex.” “I’ll leave the link for your reference.”
[blogcard url=”https://www.nexusmods.com/about/vortex/″]
I put together a series of things in a video, so please refer to it if you like. (Video in Japanese)
[blogcard url=”https://youtu.be/PMOX2xjdsfA″]
That’s all for now. “Let’s meet again in another article.” “I hope that this article will be of some help.”
[blogcard url=”https://game.bilibili.com/sailingera/en/″]
Thank you for browsing to the end.



Born in 1967, just an ordinary person who likes games. A blog I started as a hobby after retirement. We mainly take up Playstation and PC games, and post real-life experiences and petite strategies. From 2023, we are working to focus a little more on YouTube. Please drop in with the intention of killing time.
SmallandSmalland |How to b……
Cyberpunk 2077Cyberpunk 20……
Sailing EraSailing Era |Ho……
Cyberpunk 2077Cyberpunk 20……
Hogwarts LegacyHogwarts Le……
Cyberpunk 2077Cyberpunk 20……


![Cyberpunk 2077 | [Request] Defiled Shrine | Stealth clear method: quietly and quickly!](https://senryokugaigame.com/wp-content/uploads/2023/02/32eec5484af44521853ebb1aa2fda214.jpg)

